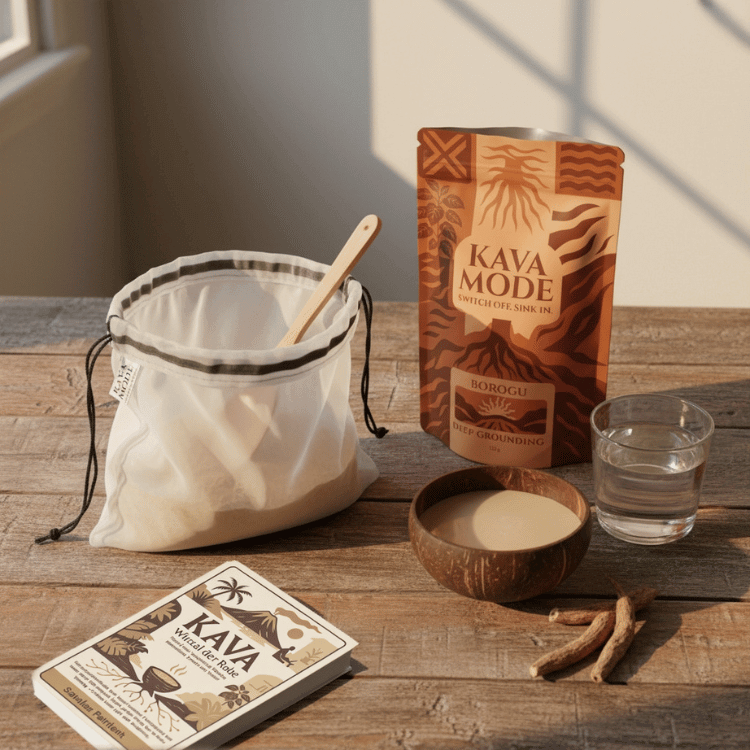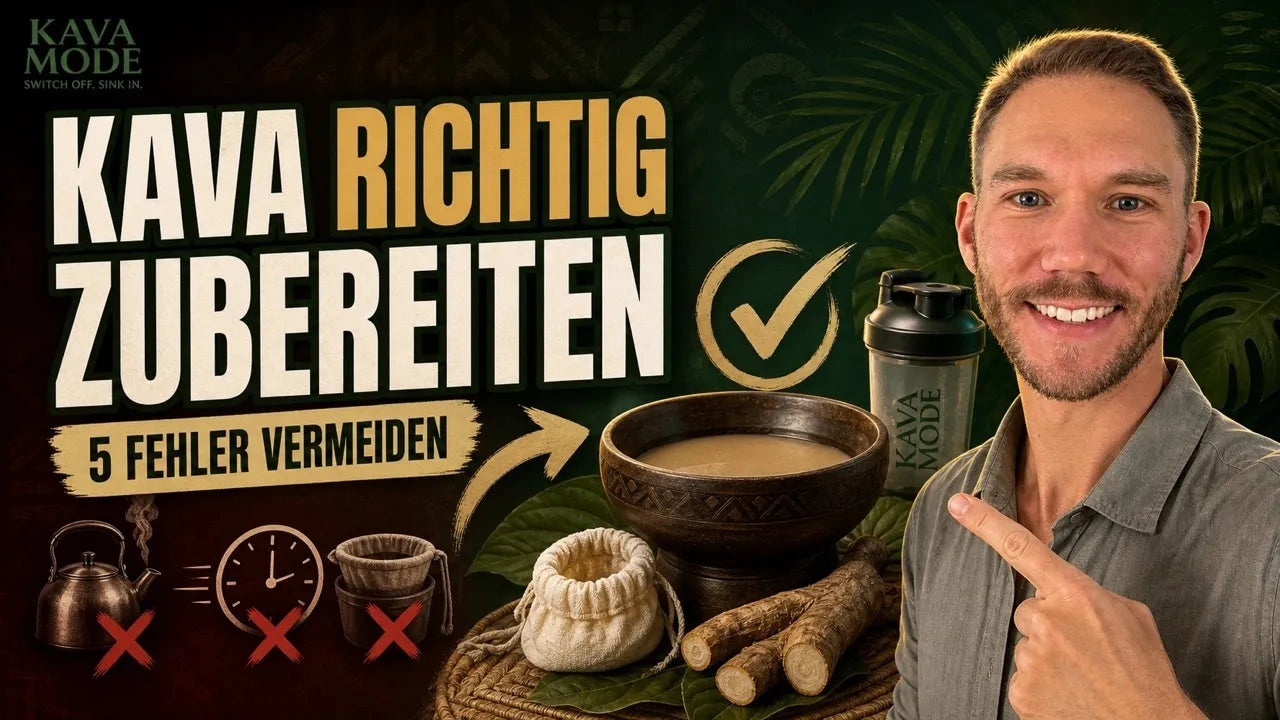
Learn about traditional preparation with a filter bag and compare it with blender and shaker methods.
⚠️ First things first: Kava is not a tea infusion. Traditional root powder involves water, careful kneading and a suitable filter bag. The good news: You don't need a professional kitchen or complicated equipment.
Kava preparation is an art that has been passed down for generations in the Pacific. But especially at the beginning, many questions arise: How much water do I need? Why does the drink stay cloudy? And how do I make the earthy taste a little milder? In this comprehensive guide, you'll learn the traditional method, modern alternatives, common mistakes and practical tips for your own routine.
🎯 What you will learn in this guide:
- 🏝️ Traditional method: Step by step with the filter bag
- ⚡ Modern alternatives: When blenders, shakers and instant are suitable
- ❌ Common mistakes: Avoid the 5 biggest stumbling blocks
- 💡 Pro tips: Work cleanly, comprehensibly and without unnecessary extras
- 🛠️ Equipment guide: What you really need (and what you don't)
- 😋 Taste hacks: Vary Kava to your taste
- ⚖️ Quantity orientation: Differentiate between grams, water ratio and drinking amount
1. Why preparation is crucial
Kava is not like tea or coffee. Traditional, ground root material is processed with water and then filtered. Just pouring and waiting is not the same process. Kneading is part of the ritual - as is separating the coarse fibers from the finished drink.
What happens when kneading
Water and mechanical processing distribute components of the root material in the liquid. Kavalactones do not simply dissolve completely in water like sugar does. The finished Kava is a cloudy preparation, not a clear tea.
🔬 Cloudy is right - loose root powder is something else
In the bag: The root material is wetted, kneaded and squeezed out.
In the drink: Fine components ensure the milky-brown appearance.
Important: Coarse fibers belong in the filter. A cloudy drink doesn't mean you should drink unfiltered powder. Its color also does not reliably indicate how strong it is.
Traditional knowledge affects your everyday life
For me, part of the appeal lies in these simple steps: provide water, knead the bag, let everyday life slow down for a moment. You don't have to make it a big ceremony. A clean workplace and an understandable process are enough to get you started.
2. Traditional Pacific preparation method
This is about traditional Noble-Kava root powder, not instant, capsules or concentrated extracts. As a concrete example we use Melo Melo and our filter bag.
What you need
- Kava powder: For the beginner example, weigh out 10-15 g of traditional root powder; Start at the lower end while you get familiar with the product.
- Water: Provide 300-500 ml of cold drinking water.
- Filter Bags: A clean, food-grade Kava filter; The specified mesh size of our nylon bag is 80 microns.
- Bowl, scales and measuring cup: So that you have space for kneading and can measure grams and milliliters in a comprehensible manner.
The quantity orientation comes from our book “Kava – Wurzel der Ruhe”, Version 10. The Melo-Melo product instructions also states a prepared amount of drink with 15-25 g per 300-400 ml. Here we deliberately start with the beginners' section from the book. Which amount suits you depends on the individual; you do not have to drink the entire amount of drink prepared. You can find the overview for beginners and experienced users in Chapter 8.

Step-by-step instructions
🏝️ Traditional preparation with the filter bag
Step 1: Preparation
- Wash your hands and check the filter for clean, intact seams.
- Pour the amount of powder measured for your prepared drink into the bag.
- Securely close the bag; leave enough space to move the material inside.
Step 2: Add water
- Pour the measured cold drinking water into the stable bowl.
- Place the filled bag inside and wet the material completely.
- Hold the opening so that no powder falls out.
Step 3: Kneading
- Knead the closed bag in the water, press it and loosen it again.
- The Melo-Melo instructions allow 10-15 minutes for this.
- The water becomes milky brown. Work evenly and do not pull suddenly on the cord or seams.
Step 4: Squeeze out liquid
- Lift the bag and squeeze out the liquid over the bowl.
- The retained plant material remains in the filter.
- If powder has escaped through an open seam or the closure, pour it again through an intact Kava filter.
Step 5: Serve and clean up
- Stir before filling as fine components can settle.
- Pour into a clean glass or small bowl. You don't have to drink the prepared amount of drink all at once.
- Remove used material and clean the filter promptly.

Why this method is easy to understand
You see every step and don't need any special equipment other than the right filter. If you note down the powder, water and processing time, you can repeat your preparation next time instead of working by eye each time.
3. Modern preparation alternatives
The traditional method is wonderful, but not always the most practical for your everyday life. The decisive factor for each alternative is: Type of Kava product and filter requirements must match.
Method 1: The Shaker
⚡ Shaker method: The system makes the difference
Equipment: A shaker system intended for traditional Kava with a suitable filter insert.
- Check whether your powder and the system fit together.
- Fill powder and water according to the respective system instructions.
- Close the filter insert and the shaker carefully.
- Shake according to instructions and check that no loose material has escaped.
Advantages: Compact and can be used without an open bowl.
Important: A regular protein shaker with a metal ball only mixes. The ball does not replace a filter; A coarse kitchen sieve is also not an equivalent replacement.
Method 2: The Blender
🌪️ Blender method: Filter after mixing
Equipment: A suitable blender plus Kava filter bag.
- Only use a product whose instructions call for this method.
- Put the intended amounts of powder and water into the blender.
- Please note the product instructions as well as the running time and filling limits of the device.
- Pour the mixture through a suitable Kava filter and squeeze it out.
Advantages: The device takes over part of the mechanical work.
Disadvantages: Additional cleaning effort; filtering remains necessary. There is no blanket “30 seconds is always enough” rule.
Method 3: Instant Kava
☕ Instant method: First check the type of Kava product
Equipment: Glass, water and a product expressly designated as instant.
- Read the quantity information for this exact product.
- Mix it according to the instructions.
- Do not transfer gram information for traditional root powder to instant or extracts.
Advantages: Few steps and few accessories.
Important: Finely ground root powder is not automatically instant. “Instant” does not mean generally weaker or stronger.
Comparison of methods
| Method | Suitable product | Filtering | Suits you if... |
|---|---|---|---|
| Traditional | Traditional root powder | Closed filter bag in the bowl | you want to get to know the process with your hands. |
| Kava shaker | Powder suitable for the respective system | Suitable filter insert according to system instructions | you are looking for a compact solution. |
| Blender | Root powder with appropriate instructions | After mixing through a Kava filter | you want to leave mechanical work to the device. |
| Instant | Explicitly marked as Instant | According to product instructions | you want to work with as few accessories as possible. |
You can find more variants on our Overview of the Kava preparation methods. This guide remains your basis for standard workflow and troubleshooting.
4. The 5 most common preparation mistakes
If something doesn't work, it doesn't necessarily have to be the wrong type. It is often worth taking a look at the process first. You can check these five points yourself.
Mistake 1: Pour Kava like tea
❌ The problem
Pouring boiling water over the powder and just letting it stand is not the filter bag method described here.
✅ The solution
For our Melo-Melo example, use cold drinking water and process the material in the bag. A kettle or boiling temperature is not necessary for this.
Mistake 2: Just stir it in instead of carefully processing it
❌ The problem
Stirring briefly once is not the same as kneading traditional root material.
✅ The solution
Give time to the intended process: for the Melo-Melo example, knead for 10-15 minutes. Above all, check whether the bag is well wetted and not so full that the powder in it can hardly be moved.
Mistake 3: Only estimate the amount and water
❌ The problem
A heaped spoonful is not a reliable measurement in grams. If the powder and water turn out differently every time, it is difficult to compare the preparation.
✅ The solution
Use scales and measuring cups and note down the amount prepared. Don't automatically take more powder just because you don't see the desired effect. In Chapter 8 we explain the difference between mixing ratio and drinking quantity.
Mistake 4: Filter inappropriately or leave the bag open
❌ The problem
A coarse kitchen strainer does not retain the same material as a suitable Kava filter. Loose powder flows directly into the bowl through an open bag opening.
✅ The solution
Use an intact filter, keep the top securely closed and filter any leaked material again. The drink may remain cloudy afterwards; it doesn't have to look clear like water.
Mistake 5: Leave the wet filter and residues lying around
❌ The problem
Damp plant material and a crumpled up wet bag are not a good basis for the next batch of drink prepared.
✅ The solution
Remove material promptly, clean filter according to manufacturer's instructions and allow to dry completely. Do not leave freshly prepared Kava unrefrigerated for a long time; Only mix in additives such as plant milk when serving. Discard any leftovers that seem spoiled instead of masking their taste.
5. Professional tips for your preparation routine
These tips make the movements easier without turning your Kava ritual into a competition for the strongest effect.
Tip 1: First prepare, then get started
Put water, scales, bag and bowl within easy reach. A non-slip surface helps if your hands get wet while kneading.
Tip 2: Change one detail at a time
If you want to compare the taste, keep the powder amount and method the same and initially only change the amount of water or a flavor additive. This way you'll notice what makes the difference.
Tip 3: Stir before bottling
Fine components settle over time. Therefore, stir before distributing. A lot of sediment or a dark color are not in themselves a reliable indication of potency.
Tip 4: Understand a second extraction with water
💡 Second round - no promised percent bonus
Our Melo-Melo instructions describe a second pass with fresh water. If you use this, do it directly in the same preparation flow and consider both passes as part of your overall approach.
How much is left over is not known in general. That's why we promise neither "30-50% additional active ingredients" nor a particularly suitable starter portion.
Tip 5: Differentiate between dry powder and finished drink
Store dry Kava tightly closed according to the packaging instructions. The powder's best-before date does not apply to a drink that has already been mixed. Therefore, only prepare a manageable amount of drink.
6. Equipment guide: What you really need
You don't need much to prepare Kava. Many of them are probably already in your kitchen. A filter that fits the product is more important than expensive extras.
Basic equipment
🛠️ Your starter set
Kava filter bags:
- Clean, food-grade material and intact seams.
- Our nylon filter has a mesh size of 80 microns according to the product description.
- Clean according to the care instructions and allow to dry completely.
Bowl:
- Stable, easy to clean and with enough space for water, bags and hands.
- You don't need a huge serving bowl; Just avoid a container filled to the brim.
Kitchen scales and measuring cups:
- Measure powder in grams, water in milliliters.
- This turns “about a spoonful” into a comprehensible preparation.
Optional extras
A suitable shaker system can be practical on the go. An existing blender is an option if the product instructions specify this method. A small coconut bowl is a nice addition to serving, but not a must.
At Kava-Mode you will find Noble Kava and matching accessories. For me, honest information is the basis for trust - that's why you should understand what you need a tool for.
What you do NOT need
- An expensive complete set of equipment: Start with the right filter and existing kitchen utensils.
- A kettle for this method: Our example uses cold drinking water.
- A mixing ball as a filter replacement: Mixing and filtering are two different tasks.
- A supposed boost in effects: More devices does not automatically mean a better result.
7. Flavor hacks and variations
Let's be honest: Kava doesn't taste like chocolate. Its earthy, tart aroma is part of the character. But you can vary the finished preparation according to your taste - without using more powder.
The 5 best flavor hacks
😋 Improve taste
1. A dash of coconut milk:
- After filtering, stir in, for example 1-2 tablespoons initially.
- This changes the creaminess and the mouthfeel.
- It is a taste tip, not a proven trick to enhance the effect.
2. Fruit as an accompaniment:
- Have a piece of pineapple or orange ready.
- Alternatively, try a small sip of fruit juice separately.
- You decide which combination you like.
3. Sweeten sparingly:
- Stir in a little honey or agave syrup after filtering.
- Start with a small amount and season to taste.
4. Serve chilled:
- Use cold water when preparing or add some ice when serving.
- For some, the tart aroma is more pleasant when chilled.
5. Dilute with coconut water:
- Add some of the finished filtered preparation with coconut water to taste.
- The drink becomes lighter in taste; The amount of kava in the entire batch does not disappear.
Creative variations
Kava smoothie: Mix already prepared, filtered Kava with a little banana and coconut milk - do not add loose traditional root powder to the smoothie.
Kava-Latte: Combine filtered preparation with a plant drink of your choice.
Tropical Kava: Season with coconut water and a small dash of pineapple juice.
Kava mocktail: Vary with fruit juice, expressly without alcohol.
These ideas are flavor variations, not new dosage rules. Note the ingredients and possible allergies. You should not “save” a drink that looks conspicuous or spoiled with additives.
8. Dosage and timing: a practical guide
“How many grams do I take at the beginning?” Here is concrete guidance from our book “Kava – Wurzel der Ruhe”, version 10, chapter 6.6 and FAQ. It refers to traditional root powder prepared with water and filtered - not instant, capsules or concentrated extracts.
Grams and water: your starting point
Practical orientation for adults: weighed amount of powder before filtering. On small screens you can move the data table sideways.
| Experience | Traditional kava powder | Water | How to use this guide |
|---|---|---|---|
| Beginners | 10–15 g | 300–500 ml | Start at the lower end of the range to get familiar with the preparation and observe how you respond. |
| Experienced users | 15–25 g | 300–500 ml | Use your previous experience with the particular variety and preparation as a guide. |
| Experienced users – larger batch | 25–35 g | 300–500 ml | For experienced users who know their individual response. Drink slowly and pay attention to how you feel. |
The amount that suits you can vary from person to person. The variety, preparation method and personal sensitivity all play a part. These ranges are practical guidance, not medically established safety limits or recommendations for daily consumption.
You can find further guidance on choosing an amount that suits you in our dosage guide.
How do I find my own way of dealing with it?
Prepare a small, measured amount of drink and drink only part of it at first. Take your time before judging how you feel about it. You don't have to empty the bowl and you shouldn't compensate for a lack of effect by quickly re-dosing. If you feel uncomfortable, stop.
More water primarily changes the ratio: 10 g of powder per 500 ml results in a less concentrated amount of prepared drink than 10 g per 300 ml. If you drink the entire amount of prepared drink, you have not used less starting material. Therefore, write down the amount of powder, amount of water and the portion drunk - this will help you more than the number of bowls or tablespoons.
Timing without a rigid re-dosing plan
⏰ Give the ritual time - not an increase plan
Choose a quiet setting without a subsequent car ride or tasks that require full attention. There is no reason to adhere to a prescribed drinking rate or fixed refill intervals.
An empty stomach, greasy food after 30 minutes or regular increases are not requirements that these instructions specify. If you feel uncomfortable, stop consuming instead of continuing the process.
Frequency and safety
A blanket weekly plan does not suit everyone. Kava may cause side effects and interactions; Serious liver damage associated with water preparations has also rarely been reported. Do not combine with alcohol or other sedating substances. If you are taking medication or have any health questions, consult a doctor in advance; Avoid it during pregnancy and breastfeeding. Find out more at NCCIH: Kava and safety.
9. Conclusion: Your personal Kava routine
Kava preparation is an art, but not rocket science. The basic rules are simple: the right product, traceable quantities, water, careful mechanical processing and a suitable filter.
The most important findings
- Type of Kava product first: Traditional root powder is not automatically instant.
- Working with water: Our Melo-Melo example uses cold drinking water.
- Filter carefully: Cloudy liquid and loose root material are not the same.
- Understand quantities: distinguish between the amount of drink prepared, the mixing ratio and the amount drunk.
- Taste varies: Add additives to the filtered preparation first.
- Close up cleanly: Clean the filter and allow it to dry completely.
Your next step
Choose a method that suits your product and your daily routine. To learn the practical steps, I recommend the traditional filter-bag method. If you are still deciding between varieties, our quick variety comparison can help.
📚 Further resources
For even more details on Kava preparation and traditional methods, I recommend my book “Kava – Wurzel der Ruhe: A comprehensive guide to effects, application, history & culture”. There you will also find cultural backgrounds and spiritual aspects of the Kava preparation.
The journey continues
Mastering Kava preparation is like learning to cook: the basics are quickly understood, and over time you find your own routine. A different taste, a more pleasant consistency, a quiet moment with the bowl in your hand - you can take your time with that.
Welcome to the world of Kava preparation. Switch Off! Sink In!
About the author
Sebastian Freidank has been working with naturopathy, biohacking and indigenous plants for over 10 years. He has been working intensively with Kava for 1.5 years and brings with him the principles that he has been practicing at drinkguya.com for almost 9 years: direct collaboration with farmers, transparency and sustainable practices. As the founder of Kava-Mode, he is committed to quality, education and honest communication in the Kava world.
🌿 Your Kava ritual begins with a conscious choice
Discover high-quality Noble Kava from Vanuatu and the right accessories for your personal Kava routine.
Discover premium Kava and equipment now
Noble Kava from Vanuatu • Complete transparency • Honest explanation